Careful craftsmanship. Every layer, every line.
Call info@procrafttileinstallation.com

Bathroom & Shower Tile

Considered preparation. Careful layout. A finish that fits the space.

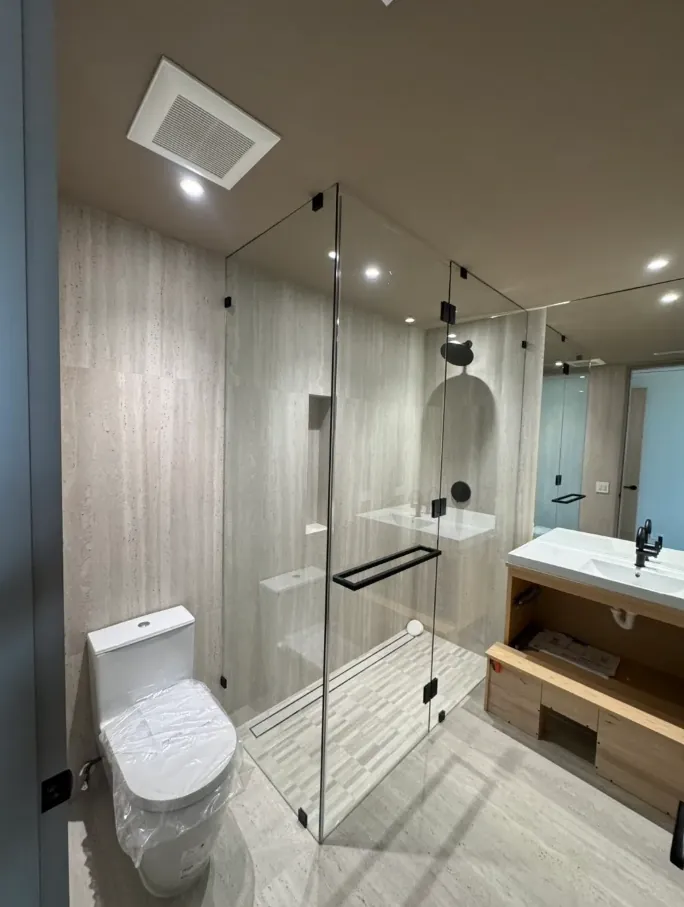
Finished bathroom with a clear glass shower enclosure, pale vertical wall tile, gray mosaic floor, and vanity

A thoughtful approach to bathroom & shower tile

A bathroom should handle daily water, steam, cleaning, and movement without losing its finish or feeling improvised. ProCraft Tile Installation provides bathroom and shower tile installation, with the planning and surface preparation needed for a clean, durable result. We help coordinate tile layout, trim, grout color, niches, benches, and transitions so the finished room feels intentional from floor to ceiling.

Good tile work starts below the visible surface. We evaluate the substrate, address plane and flatness concerns, and select setting materials for the tile, location, and exposure. In wet areas, the waterproofing assembly matters as much as the tile itself: tile and grout resist water in different ways, but neither one is a substitute for a properly detailed waterproof barrier. The installation approach is adapted to the room rather than forced into a one-size-fits-all method.

Whether you are updating a shower surround, finishing a bathroom floor and walls, or coordinating a complete tile package, our focus is precise preparation, consistent joints, and details that remain practical to clean and maintain.

What our clients say

“Tearing out the old tile is messy work, but they kept the dust contained and were thorough with the subfloor prep. Easy to reach by text the whole time. Would hire again.”

Angela M.Tile removal & new floor

“Only a laundry room floor, and they still treated it like it mattered. Showed us a dry layout first so the cuts landed away from the door. Clean, quick and fairly priced.”

Mark H.Laundry room

“They checked the floor before we even talked about tile and found a soft spot by the tub nobody else had noticed. The new floor is flat, the grout lines are straight, and they cleaned up at the end of every day.”

Melissa R.Bathroom floor

Our process for bathroom & shower tile

Plan the layout and details

We review the room dimensions, tile sizes, pattern direction, edge conditions, plumbing openings, niche or bench locations, and transitions to adjacent finishes. A thoughtful layout places cuts where they look balanced, keeps grout lines aligned when appropriate, and anticipates corners, changes in plane, and the thickness of trim or adjoining materials.

Prepare the substrate

Tile needs a sound, appropriately flat surface. Depending on the area, preparation may include removing unsuitable material, correcting minor irregularities, securing the backing, and confirming that surfaces are ready for the selected installation system. Large-format tile is especially sensitive to flatness because even small variations can affect coverage, lippage, and the final plane.

Build the wet-area protection

For showers and other water-exposed assemblies, we use a compatible waterproofing approach suited to the construction and approved system being installed. Seams, corners, penetrations, drains, niches, and changes in plane receive careful attention. Waterproofing is installed before tile, and the tile surface is not treated as the waterproof layer.

Set tile with the right materials

We choose mortar and installation methods based on tile type, format, substrate, and exposure. Coverage is checked where it matters, especially in wet areas and beneath larger tiles. Tile is set to the planned lines and spacing, while cuts around valves, outlets, corners, and fixtures are made to support a neat, serviceable finish.

Grout, movement joints, and finish work

After the setting material has cured as required, joints are grouted and surfaces are cleaned. Flexible sealant—not rigid grout—is used at designed movement locations such as inside corners, changes in plane, and certain transitions. We complete trim, edge profiles, fixture openings, and final detailing so the installation is ready for normal care.

Materials and surfaces we work with

The right materials depend on the room, the tile, and the assembly beneath it. Ceramic and porcelain tile are common bathroom choices, with porcelain often selected for its low water absorption and broad range of formats. Natural stone can create a distinctive finish, but stone is not a single material category: porosity, mineral composition, surface finish, and maintenance needs vary. Sealing requirements should be determined for the specific stone and product, not assumed from appearance alone.

In shower areas, the waterproofing method, backer or approved substrate, bonding mortar, sealants, and drain or niche details must work together. We avoid treating grout as waterproofing and select setting materials for the conditions. Cementitious grout, high-performance grout, or other grout options each have different installation and care considerations. Flexible movement joints are detailed with an appropriate sealant where movement is expected; grout is not used as a substitute in those locations.

For tile selection, we consider slip characteristics for floors, tile thickness, size, edge finish, shade variation, cleaning expectations, and how the pattern relates to the room. Trim can be tile-based, metal, or another compatible edge treatment. The goal is a cohesive palette supported by materials that suit the exposure and the way the bathroom will be used.
Shower walls, floors, niches, and benches

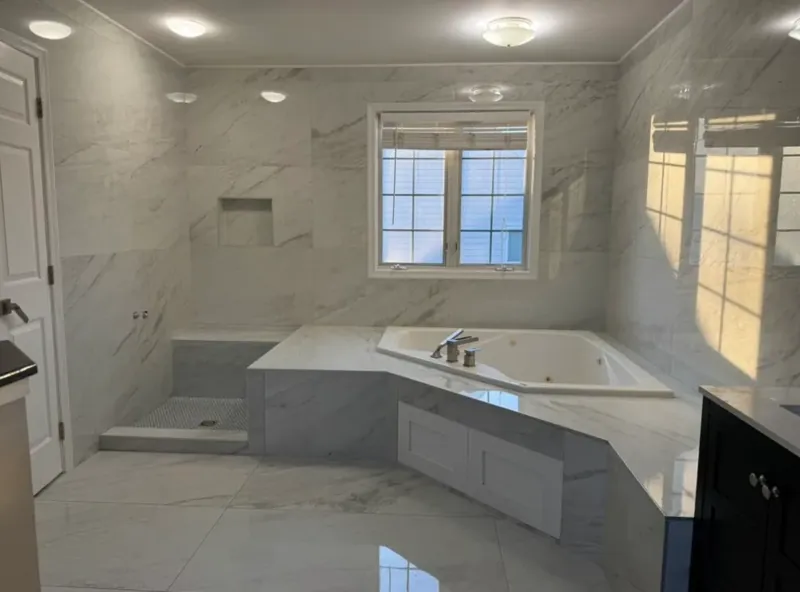
Showers involve more than setting tile on a wall. We plan slopes toward the drain, preserve the intended waterproofing continuity, and detail corners, penetrations, niches, benches, and curb or threshold transitions as part of the wet-area system. Wall patterns are coordinated around controls and shelves where practical. Shower-floor tile is selected and laid with the drainage geometry in mind; a smaller format or mosaic may be appropriate when it helps follow the slope, but the assembly and product still determine the best solution.

Bathroom floors, walls, and coordinated transitions

For bathroom floors and non-shower walls, we address substrate readiness, orientation, thresholds, base details, and transitions to other flooring or painted surfaces. Large-format wall tile can reduce visual grout lines, but it calls for a suitably flat substrate and careful handling. Patterns such as stacked, running bond, or herringbone are considered against the room dimensions and tile tolerances. At corners and changes in plane, the finish is detailed for both appearance and expected movement rather than forcing rigid grout into every joint.

Aftercare and maintenance tips

Follow the grout, sealant, stone, and tile manufacturer’s care guidance for the specific products installed. Use a non-abrasive cleaner appropriate to the surface, remove standing water when practical, and avoid acidic or harsh chemicals unless the manufacturer specifically permits them. Some natural stones and grout types require periodic sealing; sealing is product-dependent and does not make a shower assembly waterproof.

Keep an eye on flexible joints at inside corners, changes in plane, thresholds, and other movement locations. If a sealant joint separates, cracks, or loses adhesion, address it promptly rather than filling the joint with rigid grout. Do not drill or fasten through a wet-area surface without planning how the waterproofing will be protected and resealed. Routine ventilation and drying also help reduce persistent moisture and residue.

What shapes your estimate

Bathroom and shower tile installation is priced after considering the actual scope and site conditions rather than by tile area alone. Factors include demolition or surface removal, substrate repairs and flatness, waterproofing extent, tile size and layout complexity, number of corners and penetrations, niches or benches, drain and curb details, trim and edge work, grout selection, access, and coordination with other bathroom trades. Natural stone may also require product-specific handling and sealing considerations.

A clear scope should identify what is being tiled, what preparation is included, the wet-area system, selected materials, and finish details. Tile, fixtures, plumbing changes, cabinetry, painting, and other work may be separate portions of a bathroom project. We can discuss the installation conditions and design decisions needed to develop a scope that reflects the room instead of relying on a generic allowance.

Bathroom & Shower Tile FAQ

Straight answers before the first tile is set.

Is tile and grout waterproof in a shower?

No. Tile and grout form the visible finish, but they are not the waterproofing layer. A shower needs a compatible waterproofing assembly behind or beneath the tile, with seams, corners, penetrations, niches, benches, and drains detailed as a continuous system.

What substrate is needed before bathroom tile is installed?

The substrate should be sound, properly supported, and suitably flat for the tile format and installation system. Wet areas require an approved backer or substrate and waterproofing approach. The exact preparation depends on the existing construction, tile, exposure, and manufacturer requirements.

Can large-format tile be used in a bathroom or shower?

Yes, when the substrate is flat enough, the tile is handled correctly, and the layout suits the room. Large-format tile can create a streamlined look, but it requires attention to plane, mortar coverage, joint alignment, cuts, and transitions. Shower floors also need tile and layout that work with the required slope.

Should shower corners be grouted?

Inside corners and other changes in plane generally need a flexible sealant joint rather than a rigid grout joint because the adjoining surfaces can move independently. The joint should be sized, prepared, and sealed according to the selected system and product guidance.

Does natural stone tile need to be sealed?

It depends on the specific stone, finish, location, and manufacturer’s guidance. Porosity and maintenance needs vary widely, so sealing should not be assumed or treated as a universal requirement. A sealer can help with certain staining concerns, but it does not replace waterproofing or eliminate routine care.

How do I care for a newly tiled shower?

Use the recommended cure times before normal exposure, then clean with a compatible non-abrasive product, remove residue and standing water when practical, and keep the room ventilated. Follow the instructions for the exact tile, grout, stone, and sealant. Monitor flexible joints and address separation or damage before moisture can reach vulnerable areas.

Make a good start

Good tile work starts with a conversation.

Tell us about the room, the material, and what you’d like to change.